Sunday, 25 December 2011

Christmas Morning Pancakes

Well, here it is at last. Christmas day! Though some in my family are less happy about the "early" rise of 8'o'clock in the morning, I am never phased by this and so I found myself rising at 7 to make American pancakes as a surprise treat for my mother. She then came downstairs about 5 minutes after me and proceeded to bid me good morning and merry Christmas and tell me how she had been awake since 4. Some surprise, huh. Nevertheless, she was very happy and left me to cook in the kitchen.


In the midst of the present unwrapping madness, whilst my dog was shredding a paper bag, my brother was saying his hands were far too greasy to touch his new clothes and my mother was getting all emotional from the necklace that her boyfriend had given her, I was unwrapping my last present: the big box that had been sitting under the tree for almost a week, and I was overjoyed when I found out what it was; an Ice-cream machine! Well, the Gaggia Gelatiera Ice-cream machine to be precise, paired with two books solely dedicated to the making of ice-cream, sorbet and the like.


Lucky for me, this recipe required very little milk, as we are currently running out almost every other day due to my brother's constant eating, and so there was only just enough for the pancakes and a few cups of tea and coffee.


Sadly, they didn't last long enough for me to take many pictures, as they were quickly snatched away by eager hands; I was lucky to even get one! However, I did manage to get a few pictures, so you can get the picture (haha witty me! ... never mind)


So, all that is left for me to do here is give you the recipe and wish you all a wonderful holiday, whatever you may be celebrating, a fantastic new year, and I hope that you join in with all the festivities!


American Pancakes


Bare Necessities
2 Medium Eggs
150ml/1/2cup and 2tbsp Milk
50g Butter (salted is best, but if you're using unsalted butter, just add a pinch or two of salt to the batter)
110g/just over 1cup Plain Flour
10g Caster Sugar
2tsp Baking Powder


1. Slowly melt the butter. Once melted, add the milk whilst still keeping it on a low heat, then leave to butter-milk mixture to cool.
2. Separate the eggs.
3. Beat the yolks and then add the milk and butter.
4. Combine the yolk mixture with the flour, sugar and baking powder and mix until a smooth batter.
5. Whisk the egg whites to a soft peak and then gently fold in with the batter.
6. Melt a tiny bit of butter on a frying pan. (if you are using a non-stick pan then I would leave this step out as there is already enough butter in the batter.)
7. Fry the batter in small amounts at a time, I could fit about three at a time on my frying pan without them joining together.
8. Serve up with your favourite topping and enjoy!

Wednesday, 21 December 2011

Chocolate Roulade

Finally! The Christmas holidays are in full swing! I am thoroughly enjoying my lie-ins, and, with all my new found festive energy, I thought I'd tackle a recipe that I've only done once before...and change it.

I originally got this recipe from my cooking teacher at school. It worked, yes, but it did have a few flaws to it. For one, the amount of cream it told you to whip up was absurd. It was practically impossible to roll up this cake with so much cream on the inside, and when I tried to, most of it came squirting out on either side! Being one who despises wasting food, I neatly spread it on the outside to cover up the large crack that was processing along the side due to the excess cream on the inside.

Nevertheless, though rich, it was absolutely delicious, so I have made a few tweaks to the recipe and presented to to all you out there who are less persistent but love chocolaty, creamy yumminess.

Ok, so even the second time, it didn't turn out a work of art, but hey! it tasted good, so who cares?

Warning: this recipe is not for those who are "watching their weight" or "slimming to get into that perfect party dress for Christmas, even though they'll probably put it all back on again in Christmas lunch alone". So yeah. Oh, and make sure that when you tuck into your first slice, someone is there to stop you from devouring your fifth slice, for the sake of your waistline. Don't say I didn't warn you!

Chocolate Roulade

Bare Necessities

170g Plain Chocolate
3tbsp Water
5 Eggs
170g/ 3/4cups Caster Sugar
a handful Icing Sugar
300ml Double Cream

1. Pre-heat the oven to 165C(Fan)/200C(Electric)/gas mark 4.
2. Line a 9x13" tin(rough measurements so you can go a bit off but preferably not too much).
3. Break up the chocolate and put it in a small NOT TOO HEAVY bowl and then put the bowl in a saucepan half filled with water. If, when you put the bowl in the pan, the water is too close to the edge for comfort, just pour some water out.
4. Put it on a low heat and leave the chocolate to melt. Stir occasionally to prevent it from burning. Once the chocolate has melted, take the bowl out of the water and leave on a tea towel to cool.
5. Meanwhile, Separate the eggs.
6. Beat the egg yolks with the sugar until it is pale and creamy coloured.
7. Stir the cooled, melted chocolate.
8. In a separate bowl, beat up the egg whites to a soft peak.
9. Gently fold in the whites with the yolk, sugar and chocolate mixture.
10. Pour the mixture into the tin and pop in the oven for about 15 minutes or until risen and just set. You can tell this by taking it out and giving it a light jiggle back and forth. If the mixture wobbles, put it back, but if it doesn't, it's probably ready.
11. Once it's out of the oven, LEAVE IN THE TIN and cover with a sheet of baking parchment and then a damp tea towel on top. Leave it until it's cold.
12. Once cold, turn the cake onto baking parchment that has been generously dusted with baking parchment.
13. Remove about 1cm from both long edges (you can eat those parts).
14. In one bowl, whip up 200ml of the cream until stiff but still spreadable and stir in a little icing sugar to taste.
15. In another bowl, the remaining 100ml.
16. Spread the 200ml of cream on the cake and then make a slight incision about 2cm from one of the short edges.
17. Roll up the roulade, starting at the end with the incision, using the baking parchment underneath it to help. DO NOT USE YOUR HANDS! This will not work and will end up with you having more cake on your hands than on the roulade itself. Trust me, use the paper to help you.
18. Once you have rolled up the roulade, put on a plate and then spread the remaining 100ml of whipped up cream over the exterior.
19. Pop into the fridge to serve chilled.

Thursday, 15 December 2011

Rolo Brownies

Mmmmmmm I'm practically salivating at the thought of these melt-in-the-mouth pieces of chocolaty heaven goodness. Not only are these so good you'll wish you'd doubled the batch, you'll probably have to after eating so much of the mixture before you put it in the oven!

A childhood memory with an ever so slightly glorious twist added by yours truly, these are quick and easy to make, and just as quick and easy to finish!

Note: In this recipe, I didn't convert it to cups, because it is such a small measure, it would be ridiculous.

Rolo Brownies

Bare Necessities

75g Self-Raising Flour
15g Cocoa Powder
100g Butter
175g Castor Sugar
100g Plain Chocolate
2 Eggs

1. Preheat the oven to 170C/gas mark 4.
2. Grease and line an oblong tin.
3. Sift flour and cocoa powder into a bowl.
4. Put the butter and sugar into a pan and add one tablespoon of water.
5. Put on a low heat and stir until it has all melted and mixed.
6. Turn off the heat, break the chocolate into pieces, add to the pan and stir until melted and mixed.
7. Wait until the mixture has cooled enough so that you can comfortably put your hand against the side of the pan. As you've probably gathered by now, I'm impatient, so I sit the pan in a cold water bath (careful not to let any water get into the pan, obviously) and cool the mixture that way.
8. Beat in the eggs.
9. Pour the flour and cocoa powder into the mixture and fold with a wooden spoon until completely mixed.
10. Pour the mixture into a tin and then press in rolos at even intervals, so that you can have one per piece.
11. Bake for about 15-20 minutes. I like my brownies to have an ever so soft centre, so I check on them about 12 mins in, if you jiggle the tray and it doesn't wobble then it's probably cooked. Also, stick a knife in the middle, if it comes out with only a tiny tiny bit of batter on then it's cooked, but if it's a lot then it's not. It takes several tries to finally find just how you like it cooked, so just go with it, making slight adjustments each time.

Wednesday, 7 December 2011

Egg Fried Rice

I don't know what it is about this dish that makes it so good, but since I can remember, whenever my family went to a Chinese restaurant or got a Chinese takeaway, I would always insist upon getting it. I have no particular reason for cooking this, nor do I have any breaking news to tell you, so I think this week I'll get straight to the recipe. Enjoy!

NB: I made quite a simple version in this and there are some add-ins I want to do, so I may make this again in the near (or not so near, I don't really know) future. In the mean-time, feel free to experiment with it and tell me how it goes!

Egg Fried Rice.

Bare Necessities:

1/2 cup Uncooked Basmati Rice (per person)
1-3 Eggs (depending on the size, your preference and also how many people you are cooking for)
a dash Soy Sauce
1/8-1/4 teaspoon Paprika
1 clove Garlic

1. Cook the rice. The amount of water needed and the cooking time will vary depending on many things, so just check the back of the packet first.

2. Beat the eggs.

3. Fry the rice in oil with the garlic and some salt and pepper if you wish. If it isn't making those sizzling sounds after a few minutes, add a dash more oil and turn up the heat. Remember to keep moving the rice around so that it doesn't burn!

4. Clear a space in the frying pan and scramble the eggs

5. Mix the scrambled eggs into the rice.

6. Add soy sauce to taste and serve warm.

Wednesday, 30 November 2011

Apple Crumble And Custard

You can always tell that the festive cheer has hit me when I start adding cinnamon and mixed spice to almost every sweet dish I do, so if anyone happens to be staying with me, they're a bit stuffed (haha get it? like Christmas turkey?!... never mind...) if they don't like the stuff!

Double whammy this week for you guys, for, like a true Brit, it is simply impossible for me to have crumble without custard. I sprinkled dark brown sugar on top of mine before you put it in the oven, it's up to you if you do too!

Apple crumble
Ok, so in this photo I missed out flour and vanilla, sorry!

3apples
1/2 cup/115g Sugar (proportional to in apple mush)
1/2tsp Mixed Spices
1 pod Vanilla
100g Butter
1  1/2cup Flour
1/2 tsp Cinnamon
4 Ginger Nut Biscuits


1. Peel apples.
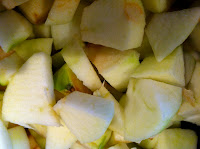
2. Take out the core and pips and chop the apples into medium chunks.
3. Put the chopped apples into the saucepan with water (put the water to less than half where apples are-if that makes sense) and add the sugar, mixed spices and vanilla (take the seeds out of it and put those it, you don't need the outer thing).
4. Mix all together and then bring to the boil (there's no need to stir this constantly, just put the lid on and leave it alone, but keep watching it!).
5. Turn off the heat once the apples are cooked and foaming slightly, but try not to let it go too mushy (don't worry if it does though!) and leave to cool.
6. Breadcrumb the butter, flour and cinnamon together.
7. Combine with the crushed ginger nut biscuits.
8. Preheat the oven to 200C/400F/gas mark 6.
9. Pour the apple into a dish, only pour the crumble on straight before you put it in the oven to save it getting soggy.
10. Put in the oven for roughly 30 mins or until the top goes slightly golden. It's totally cool if some of the apple pokes through around the edges, it tastes great!


Custard
2 cups/500 ml Milk
few drops Vanilla Essence
6 Egg yolks
1/2 cup/100 g/4 oz Caster Sugar
2 tsp/10 ml Cornflour

1. Combine the milk and vanilla essence in a saucepan. Warm gently but do not let it boil.
2. In a bowl, beat the egg yolks, sugar and cornflour together until creamy. 
3. Add the warm milk.
4. Strain the mixture back into the clean pan and cook SLOWLY, stirring constantly, until the custard thickens slightly (be careful not to let it curdle-if you do, just strain it through a sieve)
5. Serve hot or cold.

Tuesday, 22 November 2011

Run Of The Mill Bread

Haha, run of the MILL! Get it? Because its bread? Oh never mind, it was probably funnier in my head.


Jokes aside, bread is hands down my all time favorite thing to make. I don't know what it is about it, but those who have made bread in the past will probably know what I'm talking about. If you haven't ever made bread and you don't know what I'm talking about then you NEED this recipe!


For some time I had been looking for a decent bread recipe, for one that would make bread that I would actually want to eat the next day, and then my mum gave me this book and when I saw that it had a bread recipe in it, I just knew I had to make it. This bread is amazing. The bread I made by following this recipe is the kind of bread I would buy from a bakery, it's that good, and so, I implore you to cancel all your plans and MAKE THIS BREAD!


I first cooked this recipe at home and made two large rolls and they were really good, but were a tad heavy along the bottom, so, when I made it a second time at school with my good friend Becky (after finding out that she had never made bread and nearly exploding at the thought that she had been deprived from making such simplistic goodness), we divided the dough into 6 smaller rolls and it turned out much better, but, horses for courses!


AOIFE'S TIP: Cover your hands in flour before you handle to dough, this will help to prevent the dough sticking to your hands. Keep your fingers together! To get the dough off your hands, don't use water! cover your hands in flour again and rub them together. If you want to get the dough off your hands 

Run Of The Mill Bread:


Bare Necessities:
7cups/700g Strong White Bread Flour
2tsp Salt
7g/1 sachet Fast-Action Dried Yeast
OR
15g Fresh Yeast
450ml Lukewarm Water


1. Add the flour, salt and yeast (if you're using dried yeast) to a bowl and mix.
(1.5. If you're using fresh yeast, combine with the lukewarm water.)
2. Add the water to the flour.
3. Mix the flour and the water (you may want to use a wooden spoon for this, but at some point you will have to start using your hands.)
3.5. If you've mixed all the flour and water together and it's too dry, add some water, but only a couple of drops at a time, and if it is too moist, add a small handful of flour.
4. Once you've mixed all the flour and water together, sprinkle some flour onto the work surface and take the dough out of the bowl and knead solidly for 10-15 mins
5. Put the ball of dough back into the bowl.
6. Cover the bowl with cling film, and pierce the cling film a couple times.
7. Put the bowl in a warm area (e.g. the boiler room or on the radiator) and leave for about 1-2 hours or until the dough has about doubled in size.
8. Punch the dough to deflate it slightly.
9. Knead gently so as to distribute the bubbles evenly.
10. Grease with butter and/or line your baking tray(s) with greaseproof paper.
11. Shape your dough, you may like to do a plait, or just a roll, whatever you fancy, and put onto the baking tray.
12. Cover the trays again and leave in the same warm place for about an hour or until have roughly doubled in size again.
13. Preheat the oven to 230C/450F/gas mark 8.
14. Uncover the dough and put in the oven for about 30mins (rotating them half way through if needs be) or until golden brown on the top and makes a hollow sound if tapped lightly on the bottom.
15. Leave to cool and then serve up with the spread of your choice (or just plain if you want!).

Monday, 14 November 2011

Apple Mush

Ok, so TECHNICALLY it's stewed apple, but I've been eating this since I was a baby, and it's just been given that family name, even my 19 year old brother calls it that, though I suppose he's less than pleased that I told you all that.

The original reason that my mum started making it is because, as a baby, I simply refused to eat any of the baby food that she bought from the supermarkets and when she made it, as I'm sure you'll find when you make it, I just wanted more (which was coincidentally my first word, 'more'). It can be eaten hot or cold, I like it with a bit of custard, or, if I'm feeling especially naughty, hot with a scoop (or two) of creamy vanilla ice-cream; though I'm sure that you can have it with just about anything you want.

This recipe is super easy to make and takes no time at all. Proportions will vary based on the size of apples you're using and whether you want it 'sweet sweet sweet', or if you want it to have more of a 'tang'. I personally prefer it with a bit of zing, but not the tears-running-down-my-face-oh-my-god-this-is-so-sour kind of sour. And, though I'm sure that you're all perfectly clever enough to realize this, though I apparently wasn't, the apple gets REALLY hot, so don't taste it until it has cooled down some more, and if it needs more sugar, just heat it up a bit first.

Bare Nececities:
4 Bramley apples
1/2-3/4 cups/115-170g Castor sugar

1. Peel apples.
2. Take out the core and pips and chop the apples into small-ish chunks.
3. Put the chopped apples into the saucepan with water (put the water to about half where apples are-if that makes sense) and add the sugar.
4. Mix all together and then bring to the boil (there's no need to stir this constantly, just put the lid on and leave it alone, but keep watching it!).
5. Turn off the heat once the apples are cooked and foaming slightly and leave to cool.

Tuesday, 8 November 2011

Rice Pudding

You mention rice pudding to most British people and they immediately think of that chunderous gloopy stuff served at those old fashioned boarding schools, and, though I do go to a boarding school myself, we rarely get served rice pudding, and when do, though it's certainly not 'spiffing', it is almost decent. Unlike many dishes and foods I've never had phases of wanting or not wanting, liking or not liking rice pudding, I've just always loved it, haven't even been put off it by school (which is a miracle). I've always wanted to know how to cook rice pudding, and so, when I found this recipe, I just knew that I had to make it. It wasn't until I was actually making it that I realised that the instructions weren't that good, so I kind of made it up and it turned out really well! So I present to you, (mostly) my own recipe for a really quick rice pudding! I haven't made this enough to know how flexible it is, but feel free to put less cinnamon in, or exchange it for any other spices you fancy.


Rice pudding:
Bare necessities:
3/4 cups uncooked pudding rice
2.5 cups/625 ml water
8 fl oz/1cup/250 ml evaporated milk
1/2 cup sugar
1tsp cinnamon (I really like cinnamon so this was right for me, but if you're not so keen, add less)


1. Cook the rice for about 13 mins in the water or until the rice is and all the water is absorbed
2. Add the milk, sugar and cinnamon and stir.
3. Bring to the boil and then turn heat off and leave to cool

Wednesday, 2 November 2011

The Ultimate Beans On Toast

Ok, I know what you're thinking, 'Beans on toast? Why the hell
Is THAT on a cooking blog? It's quite possibly the easiest thing to cook!' Well, if you thought that, then you clearly missed out a key word in the title, 'ultimate'. Yes, I would even say that these beans on toast are arguably THE BEST beans on toast you will EVER try! (unless of course you don't like baked beans, in which case you probably won't like them)
I used to have beans every so often when I was little, but then I went through a period of my life where I just didn't really want them. It wasn't until recently (last Easter in fact), when I joined the most awesome sailing club, that I reignited my love for them. The sailing club that I go to is called Theta, and it is run by under 25-year-old's. We sail toppers and wayfarers, with the occasional row in bumface, affectionately nicknamed bumboat. We all stay on a houseboat with no electricity or running water, so no fridges or showers; and so, as you can imagine, the food rarely gets too exotic (unless of course one of the people with you that week lived abroad for some time, and so one night you might get a delicious curry for dinner). However, most meals were quite simple, and so we often had beans for breakfast or dinner, slapped together with whatever there was lying around. It was then that I realized just how good beans could taste, and so, when I got home, I was determined to make my mother be graced by the same epiphany.

After several tries I had finally gotten the recipe fine tuned to just how I liked it and, even though when describing this glorious meal of simplicity to my friends I got some less than impressed faces, I decided that is was definitely good enough to be photographed and shown to all you out there who are reading this.

Yet another über flexible recipe, you can have a small tin, an extra tin, one piece of toast instead of two, one chili or three chillies, or no chillies at all! (though I personally advise it, as it adds that slight pazazz to what could have the danger of being a boring or bland dish)

The Ultimate Beans On Toast
Serves 2-3 (quite big portions)

Bare Necessities:
 
1 tin Baked Beans
1-2 Chilies (depending on how big they are)
a squirt Ketchup
one packet Mozzarella
2-6 pieces Bread (depending on how many pieces everyone wants)
about 4 slices Cheddar
a dash Oil
Butter (to spread your toast)


1. Finely slice and dice the chilies and fry in the saucepan with a little bit of oil.
2. Once the chilies go brown (but not burnt), turn the heat down to the lowest and add the beans.
3. Stir the beans until they start simmering.
4. Add the ketchup, mozzarella and cheddar and stir until everything has melted.
5. Toast the bread and spread with the desired amount of butter.
6. Pour on the beans and enjoy!


Sunday, 30 October 2011

Chicken Noodle Soup

When I was younger my family always used to get chicken noodle soup from the local kosher restaurant, and I'm not going lie I really liked it, but I always found it too salty. I think the idea came to me maybe last winter to make some for myself and it actually worked really well, and I don't know what's in it that does this, but it always seems to make people better when they've got one of those winter bugs. And, as is the case with all soups, it lasts for ages, so you can always just cover it up and put it in the fridge, and the next time you want some, just pour yourself a bowl and heat it up!

This recipe is really flexible, you can have more or less noodles, different veggies, smaller or larger chunks of chicken, etc.. I used purple carrots in this soup as opposed to your normal orange ones simply because I saw them in the fridge and decided that they looked cool (they do). In hindsight, it probably would have been a better idea to have used the normal carrots, as my soup turned out purple and, though it still tasted just as yummy, it looked slightly less appetising and I felt like Bridget Jones cooking her blue soup.

Chicken Noodle Soup

Serves 4-6

Bare Necessities:
Noodles (About one portion should be fine, add more if you want)
1 Onion
a dash Oil
a pinch Salt
1 litre Chicken Stock/ Stock Cubes (Enough to make 1 litre of stock, for me that was 2 cubes, read the back of the package to find out)
2 cups/250g Chicken (cooked. If you don't have any cooked chicken, just fry it in a tiny bit of oil and slice it up first.)
1 Carrot


1. Put a dash of oil and a pinch of salt in a saucepan with some water and bring to boiling.
2. Put in the noodles and cook them for the time that i says on the back of the packet, but I personally would cook them slightly underdone, because they will continue to cook when you put them in with the rest of the soup.
3. Combine 1 litre of boiling water with the stock cubes, but if your using stock instead of stock cubes, ignore this step.
4. Finely dice the onion. (Tip: What makes you cry when you chop up onions is the vapour from the centre of the onion. Once you've chopped the onion in half, put it face down. This not only makes it easier to cut, but it helps prevent as many of the vapours get to your eyes.)
5. Fry the onions until golden brown with a dash of oil in a saucepan.
6. Once the onions are golden, add the chicken stock and bring to the boil and then reduce the heat so that it simmers.
7. Finely slice the Carrot.
8. Put the chopped carrot into the stock.
9. Add the chicken.
10. Once the carrots are cooked, add the noodles and turn off the heat.
11. Serve up and enjoy!


Unless you use purple carrots, yours shouldn't be purple like mine!